Wiring a 24V trolling motor can seem daunting, but it’s a crucial skill for any boating enthusiast. Understanding the basics of electrical connections not only enhances performance but also ensures safety on the water. With the right tools and guidance, anyone can tackle this project with confidence.
This article will walk through the step-by-step process of wiring a 24V trolling motor, making it easier than ever to get your boat ready for an exciting day on the lake. From selecting the right components to making secure connections, readers will gain valuable insights that simplify the task. Whether you’re a seasoned boater or a newcomer, mastering this skill will elevate the overall boating experience.
How To Wire 24v Trolling Motor
24V trolling motors provide enhanced power and efficiency for various boating activities. These motors are popular among anglers and recreational boaters for their improved performance compared to lower voltage options.
Benefits of 24V Trolling Motors
- Increased Power: 24V trolling motors deliver greater thrust, ideal for larger boats and challenging conditions.
- Extended Run Time: With 24V systems, users experience longer operation times due to increased energy efficiency.
- Improved Performance: These motors offer better speed and maneuverability, crucial for precise navigation while fishing or cruising.
- Versatility: 24V systems are compatible with a range of battery configurations, allowing for greater flexibility in power management.
- Fishing: Many anglers utilize 24V trolling motors for quiet and efficient navigation to desired fishing spots.
- Recreational Boating: Boaters appreciate the reliability and power of 24V systems for leisurely outings on lakes and rivers.
- Heavy Loads: Boats carrying additional weight, such as gear or passengers, benefit from the enhanced capability of a 24V motor.
- Long-Distance Travel: Those planning extended trips on water value the extended run time provided by 24V options.
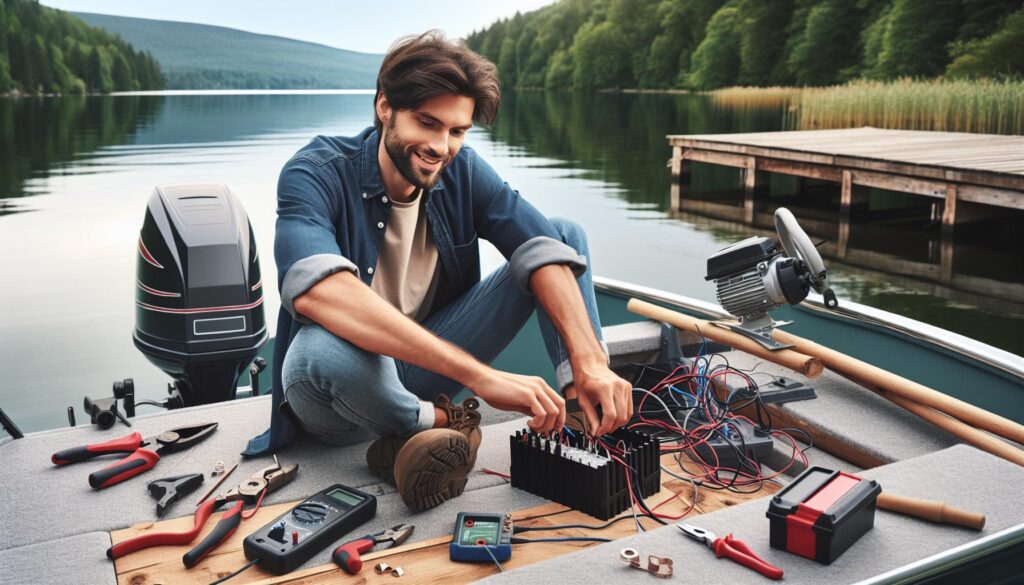
Tools and Materials Needed

Gathering the right tools and materials simplifies the process of wiring a 24V trolling motor. The following sections detail the necessary wiring tools and essential components.
Wiring Tools
- Wire Strippers: Used for removing insulation from wire ends.
- Crimping Tool: Aids in securely attaching connectors to wires.
- Screwdrivers: Required for securing terminal connections.
- Wrench Set: Needed for tightening bolts on battery terminals.
- Multimeter: Essential for measuring voltage and ensuring proper connections.
- Heat Shrink Tubing: Provides insulation and protection for exposed wire connections.
- 24V Trolling Motor: The primary component, available in various thrust ratings to match specific boating needs.
- Deep-Cycle Batteries: Two 12V batteries wired in series create the necessary 24V system.
- Battery Cables: Heavy-duty cables connect the motor to the batteries, available in various gauges for different applications.
- Fuse or Circuit Breaker: Protects the system from overload and prevents damage to components.
- Connectors: Ring terminals and quick-disconnect fittings facilitate secure connections.
- Battery Switch: Enables easy disconnection of the motor from the power source when not in use.
Step-by-Step Wiring Guide
Wiring a 24V trolling motor involves careful preparation and precise connections. Follow these detailed steps to ensure a safe and effective installation.
Preparing for Installation
Gather all necessary tools and materials. Required tools include wire strippers, crimping tools, screwdrivers, a wrench set, a multimeter, and heat shrink tubing. Required materials encompass the 24V trolling motor, two deep-cycle batteries, appropriately sized battery cables, a fuse or circuit breaker, connectors, and a battery switch. Confirm compatibility among components to prevent issues during installation.
Connecting the Batteries
Position the two deep-cycle batteries in a well-ventilated area. Use the battery cables to connect the positive terminal of the first battery to the positive terminal of the second battery. Then, connect the negative terminal of the first battery to the negative terminal of the second battery. This series connection boosts the voltage to 24V. Ensure tight connections to minimize resistance.
Wiring the Motor
Identify the motor’s positive and negative terminals. Connect the positive lead from the battery bank to the motor’s positive terminal. Connect the negative lead from the battery bank to the motor’s negative terminal. Secure all connections and ensure they are corrosion-resistant using appropriate connectors, ensuring a safe and reliable operational setup.
Installing the Circuit Breaker
Select a suitable location for the circuit breaker, ideally close to the battery terminals. Use a wrench to securely attach one terminal of the circuit breaker to the positive battery lead. Connect the output terminal of the circuit breaker to the motor’s positive terminal. This step protects the system from overloads and short circuits. Ensure all connections are tight and inspect for any potential hazards.
Troubleshooting Common Issues
Boaters may encounter various issues when wiring a 24V trolling motor. Identifying and addressing these problems can ensure a smooth boating experience.
Connection Problems
Connection issues often arise from improper wiring or loose terminals. Follow these steps to resolve them:
- Check Connections: Inspect all connections for tightness and ensure no frayed wires exist.
- Confirm Polarity: Ensure the positive and negative terminals are connected correctly, as reversing these can damage the motor.
- Use Quality Connectors: Employ high-quality connectors to prevent corrosion and ensure a reliable connection.
- Test With a Multimeter: Use a multimeter to measure voltage at various points in the circuit. A significant drop indicates an issue in the wiring.
- Inspect Battery Charge: Check battery voltage to confirm it meets the required 24V. Low voltage can lead to underperformance.
- Examine Wiring: Look for damaged or inadequate gauge wiring, which can restrict current flow and affect motor performance.
- Assess Motor Functionality: Test the motor by running it at various speeds. If it hesitates or fails to respond, it may require professional evaluation.
- Monitor Heat Generation: Check for excessive heat during operation. Overheating can indicate an overload or a problem with the motor’s internal components.
Maintenance Tips for Trolling Motors
Regular maintenance ensures optimal performance and longevity of trolling motors. Following systematic care procedures prevents issues and extends the motor’s life.
Regular Inspections
Regular inspections of trolling motors identify potential issues before they escalate. Examine the motor for signs of wear or damage, paying close attention to wiring and connections. Ensure all connections are tight and free of corrosion. Inspect the propeller for debris, damage, or bending, as these factors directly impact performance. Check the battery connections to ensure they are secure and clean. Monitor the motor’s operation for unusual sounds or vibrations, addressing any abnormalities immediately.
Winterization Procedures
Winterization procedures protect the motor during off-seasons. First, clean the motor thoroughly to remove dirt and salt residue. Disconnect battery cables, ensuring the terminals remain clean to prevent corrosion. Store batteries in a cool, dry location while maintaining a charge. If applicable, drain and flush the cooling system to remove any contaminants. Apply lubricant to moving parts and seals to prevent rust and wear. Finally, cover the motor with a breathable material to shield it from dust and moisture during storage.
Regular Maintenance And Proper Troubleshooting
Wiring a 24V trolling motor is a crucial skill for boaters looking to enhance their on-water experience. With the right tools and knowledge, anyone can successfully set up their motor for optimal performance.
Regular maintenance and proper troubleshooting can prevent issues and extend the life of the motor. By following the guidelines outlined in the article, boaters can enjoy the benefits of increased power and efficiency, making their time on the water more enjoyable.
Embracing these practices ensures reliability and safety, allowing boaters to focus on what truly matters—making memories on the water.